Wednesday, November 20, 2013

Abominable Snowman Cookies-in-a-Jar (Updated!)

With Christmas just around the corner, I'm reposting a fun and easy gift to put together for your friends, neighbors and co-workers. Also, I've updated the post to include links below to download/print the labels! Enjoy!!

I love baking all year round, but I'm especially a fan of holiday baking.  I love the colors, the flavors, the smells...all of it.  The one thing I don't love about it is how it sticks to my hips and follows me into the new year!  I figure I'm not the only one that feels this way and rather than having piles of baked goodies that just must get eaten before they go bad (I mean, you don't want to let them go to waste!), I thought I would give some sweets that can be tucked in the pantry to be saved for February (you know, after everyone has stopped going to the gym and fallen back into old habits :)).

I adapted this recipe from Bakerella's Cowgirl Cookies.  The only difference in my recipe is that I used slightly different measurements (I tried to use the same on my first batch and could not for the life of me get it all to fit in my quart jar), holiday M&Ms and instead of using chopped pecans as my filler, I used Heath Bits-o-Brickle (I'm not a big fan of nuts in my cookies and besides that, chopped pecans are dang expensive!).

Since the cookies are essentially Christmas Monster Cookies...I thought why not name them after one of the most famous Christmas monsters, the Abominable Snowman?  It was either that or Grinch cookies, but I didn't love that font and color scheme as much :).

So, here’s the recipe:

Abominable Snowman Cookies
1 1/3 cup all purpose flour, spooned into measuring cup & leveled
1 teaspoon baking powder
1 teaspoon baking soda
1/4 teaspoon salt
1 cup cooking oats
1/2 cup m&ms
1/2 cup semi-sweet chocolate chips
1/2 cup brown sugar, packed
1/2 cup white sugar
Heath bits-o-brickle (basically just enough to fill it to the top)

Start with a 1 quart Ball jar. I found mine at Walmart - made by Better Homes & Gardens.  It was only $8 for a box of a dozen.

First: flour, baking powder, baking soda and salt
Second: oats
Third: m&ms
Fourth: chocolate chips
Fifth: brown sugar
Sixth: white sugar
Seventh: Heath bits

Pack each level down really tightly. I mean it. Pack it in. Or else it won’t all fit. I used the bottom of a spoon as well as the base of a spice jar to help smoosh it down.  Also, I added the Heath bits last, because if the ingredients were too much or not enough, then I could add more or less Heath bits to adjust. The ingredients should be flush to the top of the lid when you seal it up.  I will also say that I purchased the canning funnel made specifically to fit the mouth of a ball jar - and at $1.75 it was absolutely worth it.  Made the process a whole lot easier.


For the labels, you’ll need some adhesive paper (I use 8.5x11 sheets of shipping labels purchased from Staples or any office supply store) and paper punches (2 1/2" circle and 1 7/8" scalloped).  You could also use regular paper or card stock and double-sided tape.


You can find the print-ready PDF labels and instructions here and here.

The last few details involved ribbon and material.  I just purchased some inexpensive tiny polka dot material from the quilting section of my local Joann's (I believe it was $4.99/yd and I purchased just a 1/2yd which was more than enough for 12 jars).  I traced the mouth of my cereal bowls to get the right size (ended up around 6 1/4" diameter) and cut them out with pinking sheers.  I purchased the 1/2" ribbon at Joann's as well ($2.99 for 9ft although it was a steal at 60% off!).  I needed 2 rolls for 12 jars and I used my hot glue gun to adhere the ribbon to the jar (placing the cut edge underneath the label).

All costs included (ingredients, jars, canning funnel, material and ribbon - I already had the label paper), each jar ended up costing right around $4.50!  What a fun, creative and inexpensive way to love on your neighbors, co-workers, family and friends this Christmas!  Enjoy!

Monday, May 14, 2012

Rad Rocket Invitation Set

I'm behind on my goal of a set a week (umm...as in like 2 MONTHS behind. Ouch.), but I've got some more ideas in the works and hope to get back on task!  This party was inspired by a little boy that I get the privilege of hanging out with a couple of times a week.  He loves rockets!  He was a rocket for Halloween, he has rocket toys, and turns things that are not rockets (carrots for example) into a rocket.  I couldn't resist making the rocket orange in honor of the carrot :), and I'm a big fan of the retro feel of an orange/turquoise-ish blue color combo, and from there the Rad Rocket Invitation set was born.  You can find all of the pieces for sale in my Etsy shop!

 If you need a little inspiration on how to put together a rocket party...check out some of these ideas:

I love these cute little rocket party favors from Martha Stewart.  When you click on that link it will give you the step-by-step instruction on how to make them, and you could easily change out your paper and candy (maybe something fun to go with theme - like Pop Rocks? :)) to coordinate with the colors of your party. What a fun and adorable idea!

Need a cake to go with your party theme?  Check out this fun and simple rocket cake from Parenting magazine.

What would a little boy's rocket themed party be without an actual rocket launch?  Check out this great idea for a water bottle rocket launcher from Me and My Insanity.  That sounds like a "blast" of a way to top off a fun birthday party!


Wednesday, March 14, 2012

UP, UP & AWAY!

I love party themes that give room for simple creativity.  They don't require extensive searching for the "perfect piece" because the party consists of basic items (balloons, candy, straws, etc.) in punches of color.  My roommate came up with the theme "Up, Up & Away" and as soon as she said it...I started seeing bunches of red balloons.  Now realistically, this party could work in any color (and if you have a color in mind - let me know and I'd be happy to change the invitations to suit it), but I love the idea of a red party with pops of light blue.  As always - you can find all of the pieces below in my etsy store!
^ (L) invitation (R) insert front & back

^ editable envelope wraps

^ party circles - perfect for cupcake toppers, bottle toppers and many other fun uses!

Need some inspiration for the theme?  Check out these links!

^ check out this amazing Classic Red Ball birthday party from Pen n' Paper Flowers. Love the licorice, the red cake pops...and in other photos she completely covered the ceiling in red balloons! Great inspiration for Up, Up &Away!

 ^ Suitcases would be such a clever idea for an Up, Up & Away theme in this party from Polka Dot Birthday!  I also love the idea of incorporating cherries since they resemble red balloons - but maybe on top of a "sky high" ice cream sundae?

^ I just LOVE giant red balloons and they would definitely be a must if I were hosting an Up, Up & Away party! Such a great shot from Bliss Bloom.


Monday, March 12, 2012

The REAL Pot-o-gold

Friday is my roommate's birthday but since I'll be out of town on the actual day, we're celebrating with some friends a little early this year.  It just so happens that her birthday falls the day before St. Patty's AND her favorite flavor combination is chocolate and mint...so here is my St. Patty's Day creation that is really her birthday-cake-in-a-jar :).  I've decided to call it "The Real Pot-o-gold".

 It all began when I fell in love with these jars. Every. single. one. I've never canned anything in my life but those jars make me want to plant a garden and have a cellar full of jams, veggies and fruits and well...anything and everything that would fit in one of those jars.  I could have gone jar-crazy and ordered a case of every different size, but I showed great restraint and just started with the 760 set.  If you aren't sold on them yet....let me show you what it looks like with the lid on (minus the rubber seal)...

I mean, seriously. Is that not the cutest thing?!

Anyway...on to what is inside!!  I started with a chocolate mint oreo and then made my favorite chocolate cake recipe and dropped a heaping tablespoon on top of the oreo (trying carefully to not smear it down the side of the jar).  The jars I used happen to fit perfectly inside a standard muffin tin, so I placed each on in the muffin tin and baked them at 350 for 20 minutes (watching them every 5 after the first 10 minutes or so. I'm sure every cake recipe and oven will vary).  While they cooled I mixed together the creme de menthe cream cheese frosting as well as my mom's amazing hot fudge sauce.  I also took one row of mint oreos and crushed them in a ziplock bag.  Once cooled I piped in the cream cheese icing making sure it covered all the way to the edge to give a nice green layer on top of the cake.  Then I dropped a heaping teaspoon of the (cooled) hot fudge sauce on top and sprinkled that generously with oreo crumbs.  I sealed each one up with a lid and set them aside until ready to serve with ice cream. And then I did an irish jig. Either that or I licked all the beaters. I can't really remember it all.

If you want a fun gift to give to a friend for St. Patty's day or just a fun dessert to serve to your family or at a party - give this one a try!

As I mentioned - I just used a favorite chocolate cake recipe, but I would highly recommend only making a quarter of the recipe if possible.  I hardly used any of the batter and now have a ridiculous amount of chocolate cupcakes leftover :).  The rest of the recipes you will find below:

Creme de Menthe Cream Cheese Icing

1 (8 ounce) package cream cheese, softened
1/4 cup butter, softened
1 cup sifted confectioners' sugar
1/2 teaspoon creme de menthe

In a medium bowl, cream together the cream cheese and butter until creamy. Mix in the creme de menthe, then gradually stir in the confectioners' sugar (add more to reach desired thickness). Fill disposable piping bag and cut off tip to pipe.  Store any remaining frosting in the refrigerator after use.

Mama Dubes Hot Fudge Sauce

1/2 c. sugar
3 Tbsp. cocoa
1 1/2 Tbsp. cornstarch
1/2 c. room temperature water

2 Tbsp. butter
1 tsp. vanilla (I substituted creme de menthe for this recipe)   

1. Mix together the dry ingredients in 1 qt. casserole or 2 c. glass measure. Stir in water

2. Cook in the microwave on full power for about 1 1/2 minutes. Stir half-way through cooking time.  Blend in butter. Cook on full power for 30 seconds or until butter is melted. Stir halfway through cooking time. Blend in vanilla (or mint). Stir thoroughly.

Friday, March 9, 2012

Sweet as a Strawberry

Two posts in ONE week! Can you believe it?!

Now don't start getting used to it or I'll cave under all the pressure :)...but I'm crossing my fingers that maaaaybe, just maybe I'm finally starting to get the swing of things and will blog more frequently.

Today I'm posting another invitation set that I created recently and have also added to my Etsy shop.  This set was inspired by my twin niece & nephew turning 8 this week.  My niece requested a Strawberry Shortcake party and while I would have loved to have been there to help assemble the party and make a cake...the thousands of miles between us makes that a bit complicated.  I will also add that my nephew requested a Star Wars party but I haven't quite been inspired by that theme yet (sorry, Will!) :).

 ^ (L) invitation (R) insert card front & back

I'm a huge fan of pattern if you haven't already noticed, so when I started thinking strawberries I immediately thought polka dots and gingham.  This set would be great for a little girl's birthday party or a sweet baby shower as well.
 ^ cupcake toppers
^ editable envelope wraps

If you need some inspiration for a party with a similar theme...check out these adorable options!

^ from my happily ever after. Strawberry pancakes...need I say more?!

^ or how about this "berry sweet" dessert table from glorious treats?

^ I love this strawberry cake and coordinating party from cakewalk baking.  The poms on the wall are adorable!

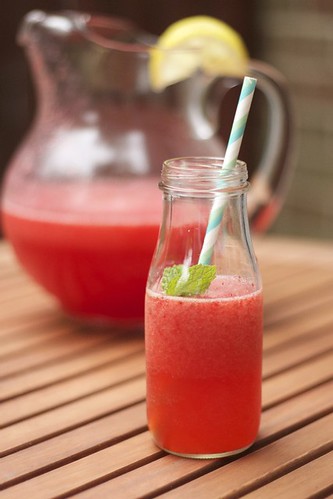
^ and what would a "Sweet as a Strawberry" party be without strawberry lemonade?  Love this presentation (and recipe) from dainty chef. Would also look great in jelly-size ball jars!

Tuesday, March 6, 2012

You Are My Sunshine

Well I'm obviously off to a VERY slow start to 2012 considering this is my first post of the new year.

Excuse me as I hang my head in shame for just a moment.

Alright, moving on!  I've started working on some new invitation designs for my Etsy shop.  I would love to say that I have a great party to go with the designs, but unfortunately I haven't had the time or occasion to put something together, but some other very talented people have, so if you love the theme but just need a bit more inspiration on how to pull off the party, check out the pictures & links below!  But first...the invitations!

^ (L) invitation (R) insert front & back
 ^ Cupcake Toppers
 ^ Envelope Wraps (*envelopes not included)

I tried to create a design that could work for a multitude of events all using the same theme.  "You Are My Sunshine" works great as a birthday party or baby shower, but I even think it would be adorable for a bride or couple's wedding shower.  I'm just ever-so-slightly in love with chevron print (zig-zag) and couldn't help but pull it into this bright & fun design.  You can find all of the pieces pictured above in my Etsy shop!  Want your party to be yellow and pink or yellow and turquoise? Not a problem!  I can easily tweak the design to go with your party's theme.  Just contact me through my Etsy shop and I will make it happen :).

^ I'm completely in love with the backdrop and tablecloth of this yellow & grey baby shower from Bump Smitten. Click on the link to see more great pictures from the party. Gorgeous!

^ check out this great Sunshine party from Lorajean's Magazine!


^ love the grey striped straws with yellow streamers featured on heart, love, weddings. Perfect to sip fresh squeezed lemonade at your Sunshine shower!

Thursday, December 15, 2011

Merry Christmas from Frilly Milly

What better way to say "Merry Christmas" than a colorful batch of glace icing!  I shot this the other day and couldn't help but turn it into a Christmas card.  You've still got 10 days left to go - and I hope each and every one is filled with art, baking, creating, spending time with people you love and most importantly, remembering the true Reason for the season.  Here's wishing you and yours a very blessed holiday.  Merry Christmas!

Monday, December 12, 2011

Cookies for Santa


Last Saturday my friend joined me for a night of cheesy Hallmark Christmas movies (not gonna lie, totally love them) and holiday baking.  We made peanut butter fudge Gingerbread Men (see previous post) and dozens upon dozens of sugar cookies. Be still my beating heart! :)

We quickly ran to the store to pick up our ingredients, grabbed some dinner "to go" and last but not least, stocked up on cookie cutters!  My local Joann's sells a great 40 piece set (some large, some miniature) for $19.99, but with a 50% off coupon it was just too good to pass up.


We had a great little assembly line going - I would roll the dough, she would cut the shapes and I would transfer them to a cookie sheet.  An hour or so and 5 dozen cookies later...we were ready to start frosting.

I've tried various frosting techniques over the years, but I'm kind of a sucker for a more "polished" look, so when I saw this technique on Our Best Bites' site, I was sold.  Based on our cookie cutter choices, we chose to make red, green, blue, yellow, brown and white icing.  One thing I will tell you is that a little goes a long way with this type of frosting.  You'll look at your bowls with just a large spoonful and think it will never be enough...but you'll be amazed at how far it stretches. Trust me.

The last step in making the icing is to make the piping.  I remember coloring with my dad before bedtime when I was a kid and he would always outline his picture before shading it all in which always made it look so good (especially in comparison to my scribbles!).  In the world of sugar cookies, piping is that outline and the icing is the shading (thankfully now I'm actually able to "stay in the lines" :)).  Put a #3 tip on a pastry bag, fill it up with a thicker version of the icing (see instructions) and begin outlining.  You'll want to get a head start on this process since you need it to dry just ever so slightly before you begin flooding the cookies.  It's fun and it goes pretty fast - even better if you've got a partner in crime that starts the decorating while you finish the piping!

When it comes to the flooding (again, at some point I need to improve at taking step-by-step photos!), I use tiny demitasse spoons and toothpicks.  I scoop a little bit of the icing with the spoon and pour it into the center of the cookie, then drag it to the edge of the piping with the toothpick.  Want berries on your wreath or buttons on your snowman?  While the main color of your cookie is still wet (say the green of the wreath), take a toothpick and dip it into the red and gently tap tiny drops of the icing onto the green.  Seurat's got nothing on you!

And this, my friends, is the final result!
Share them with friends or save them for yourself (I ate one for breakfast this morning), but most of all, enjoy the creative process.  Turn on Christmas music, light up the tree, grab a cup of hot cocoa and frost away!  Merry Christmas!

Sunday, December 11, 2011

Christmas Fudge

I don't know about the rest of you, but fudge is pretty much a staple for me when it comes to holiday baking.  I'm not opposed to any variations (although I think chocolate mint might be my favorite), but when my friend Rachelle specifically requested that we make peanut butter fudge, she didn't have to twist my arm!

I know there are so many variations, but I love this recipe - it only requires 6 ingredients and is finished in 15 minutes or less.  Most recipes, including this one, ask that you pour the fudge into an 8x8 pan to make the standard, thick squares of fudge. I prefer to pour the fudge into a small 10x15 jellyroll pan and then smooth it out as evenly as possible using a large sheet of wax paper.  Once it's cooled and the fudge has completely set, I like to cut the fudge into fun shapes using small cookie cutters.  In the fall I made pumpkin fudge and cut it out into the shape of leaves...


So it was only fitting that in the spirit of Christmas, we turned our peanut butter fudge into Gingerbread Men.


If you want to really get crazy, you can use a toothpick to poke holes for buttons and eyes (and drag it for the mouth), and fill the holes with nonpareils.

One thing you'll find is after cutting out your first round of gingerbread men, you'll have a lot of "scraps" left over.  The great thing about fudge is that it's extremely pliable, so just combine the scraps, roll it out between 2 sheets of wax paper and continue on the cutting process!  Enjoy!

Friday, December 9, 2011

Christmas Pirates

Lately I've had the chance to work on a few Frilly Milly projects (not nearly as many as I would like - but hey, I'm happy to get to "play" at least a little bit!) and thought I would just post a few photos and tips on how to recreate them if you so desire.  The one I'm most excited about is not quite finished yet, but hopefully will be up sometime the beginning of next week if not sooner.

The first project is not really Christmas-y, but I received an order for pirate cupcakes for a birthday party and the leftovers turned into something a little bit festive :).  First...the pirates.

The  cupcakes are chocolate cake with buttercream icing.  I know fondant looks better, but I don't like the way it tastes so I stick mainly with buttercream and just work to make it look as smooth as possible.  I just made 3 different colors of buttercream - the skintone (using copper gel coloring), red ("no taste" red gel) and black (I used a combination of the black gel along with a little cocoa powder to get a rich black).  I apologize for not having step-by-step photos (which would make this so much easier to follow), but I'll try to at least explain each step of the process.

I frosted each cupcake with a #1A tip making a swirl starting along the outside edge and working my way into the center (not building up...just filling in).  From there I took my small palette knife and smoothed out the swirl.  I let the icing crust for about 10 minutes before going back over them with a small square I cut out of a VIVA paper towel (solid white - no print - using the softer side on the cupcake) to get a fondant-like smoothness.

Next, I used a #104 petal tip for the red and starting not quite at the center of the cupcake (with the "head" of the pirate pointed toward me and fat side of the petal tip facing toward the "chin" of the pirate) and made slightly curved stripes from left-to-right layering on top of each other slightly and tapering at the right-hand corner where the "knot" of the bandana would go.  I created a little knot using the same tip.

From there I moved to the black icing with a #3 tip.  I made a long diagonal line over top of the bandana to the base of the chin from left to right.  Small black eye dot on the left, large black eye dot on top of the black line on the right and then facial hair, smiles, etc.  Place a junior mint on the large black dot of the right eye and viola! Your pirate cupcake is complete!

Since I had several cupcakes left over and quite a bit of icing as well, I turned the rest of the cupcakes into Santa Claus!  The only addition was a bag of white icing using a #12 tip.  I used the same method for the hat as I did for the pirate's bandana - except just going straight across rather than curving.  I even had an extra pirate leftover and turned him into a Santa as well (I just have a small picture taken from a phone of that cupcake - but it's worth seeing because it just makes me laugh!).  

So whether it's a Pirates or Christmas party - or better yet, a "Pirates of Christmas" party :), now you have a fun and festive dessert to share!


Tuesday, October 4, 2011

Vineyard Birthday Party

In celebration of my sweet friend Courtney's birthday, I called up a few of the girls and planned a night out at one of our favorite places, Arrington Vineyards.  I arrived early (or so I thought) only to find the place already crawling with people and only just a few picnic tables left to choose from, but with a spread of land that beautiful, any spot is a good spot!

When you arrive at Arrington you have to park at the bottom of a large, steep hill, so hauling anything beyond a pair of wine glasses is quite the feat!  So although I packed up quite a few serving pieces and accessories into a large tote, I tried to keep the overall menu very simple.  We had croissants with brie, turkey, honey mustard and the option of apple or pear slices (I tried half-n-half and loved them both!), pretzels and hummus, fresh fruit, spinach salad with goat cheese, walnuts, strawberries and a blush vinaigrette (which, sadly, is not pictured since I forgot a decorative serving bowl! Sorry, Ashley!), water, lemonade, and of course, wine :).  I made a small pink champagne cake with buttercream icing and cupcakes to match, but the rest of the items were brought/made by my amazing friends.